Tuesday, 3 January 2023

The treachery of images - Desktop as performance space

* This is a version of the talk I gave online during Fubar 2022


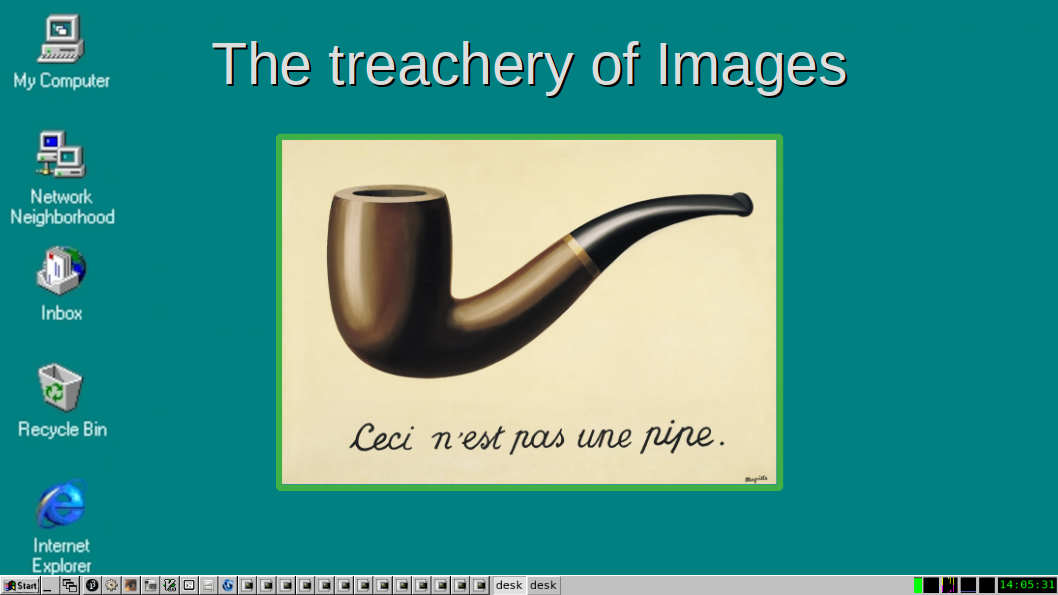
Hello everyone - I'd like to welcome you to my desktop, as this is what I will be talking about.  I want to start with a digression into art history . Consider this  , “The treachery of images” by Rene Magritte from 1929 . 
 

It is a painting of a pipe with  text in French which reads ‘this is not a pipe’ . It seems obvious to me as an ex-painter  that this is indeed not a pipe, it is a painting of a  pipe.  I'd like you to keep this in mind throughout this talk. My desktop might superficially look like Windows 95 but it isn’t , again bear this in mind.

How do we interact with our computer? In the beginning, after punch cards, was the command line 

be it on mainframes or later home computers  first it travelled by teletype.  A teletype is essentially a two way terminal connected to a computer using a keyboard and paper roll for input and  output. There is a great video of that here https://www.youtube.com/watch?v=gMIL2bvUYIs&t=2s

 
After the teletype came the vdu or visual display unit , rather than a paper roll we now have a screen for interaction but essentially its the same as a teletype but it removes one level of interaction, rather than seeing a continuous physical printed record of what we have typed and received back from the computer we see a screen with non physical electronic readout. 
Credit for source image

Trammel Hudson https://www.flickr.com/photos/osr/


But the beginnings of the interface as we understand it  came with what is known as  ‘the mother of all demos’ given by Douglas Engelbart so called because it introduced pretty much all of the fundamental ideas behind modern computer graphical interfaces – more info here https://en.wikipedia.org/wiki/The_Mother_of_All_Demos  ) on December 9, 1968

To quote from the wikipedia article “ The live demonstration featured the introduction of a complete computer hardware and software system called the oN-Line System or, more commonly, NLS. The 90-minute presentation demonstrated for the first time many of the fundamental elements of modern personal computing: windows, hypertext, graphics, efficient navigation and command input, video conferencing, the computer mouse, word processing, dynamic file linking, revision control, and a collaborative real-time editor. Engelbart's presentation was the first to publicly demonstrate all of these elements in a single system. The demonstration was highly influential and spawned similar projects at Xerox PARC in the early 1970s. The underlying concepts and technologies influenced both the Apple Macintosh and Microsoft Windows graphical user interface operating systems in the 1980s and 1990s.”


Considering that that demonstration was in 1968 lets look at what  we call a desktop. Be it based on some derivative of the following:

Macintosh classic desktop

Windows 3.11 desktop.
Windows 95 desktop.

Mac Os 10.5.4 desktop

The gnome 3 desktop

The interface that we use to interact with our computers or devices, the icons that we click on for a word document, the images that we manipulate with the Gimp or other software , a paintbox program that gives us brush options and colours , the video editor that shows us a time line laid out in a film strip fashion, all of these inhabit the same space as the pipe in ‘the treachery of images’, they are nothing more than signifiers that allow us to navigate an alien and strange landscape which bears no relation to how we see it.

Consider the idea of skeumorphism – to quote from https://www.interaction-design.org/literature/topics/skeuomorphism

“Skeuomorphism is a term most often used in graphical user interface design to describe interface objects that mimic their real-world counterparts in how they appear and/or how the user can interact with them. A well-known example is the recycle bin icon used for discarding files. Skeuomorphism makes interface objects familiar to users by using concepts they recognize.”

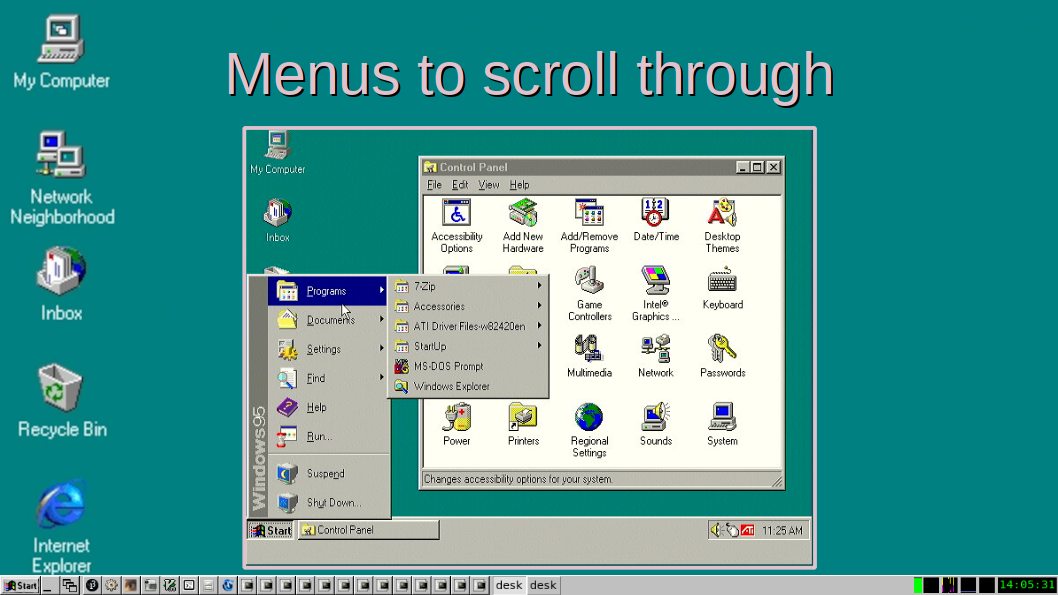
Unlike the pipe in Magrittes  painting we can interact with the ‘objects’ on our desktops, we have menus to scroll and click through;

 We have buttons to press;

waste-bins to fill and to empty;


file managers to organise our files;

It makes the unreal real, an electronic office in which we can ‘work’.

This paradigm of the desktop metaphor reflects  the corporate origins and mindset of most of the software we use. Both Windows and MacOS are designed for cubicle dwellers, office drones and ad jockeys . 


How can we break out of those inbuilt constraints to move away from mimicking ‘real world counterparts’ using the software in a performative and meaningful way, to make art from and in this space rather than using its tools to create ‘work’ that is then seen as separate from the environment in which it was created. In other words how do we stop ourselves from perceiving a desktop when in fact what is in front of us is an entirely different thing.

Jodi's My%Desktop was one of the first hints to me personally that something else could be done within this space ( more info here https://www.moma.org/calendar/galleries/5160 )  as it says on The MOMA site for that exhibition 

"JODI recorded various versions of My%Desktop in front of live audiences, connecting their Macintosh to a camcorder and capturing their interactions with the user-friendly OS 9 operating system. The resulting “desktop performances,” as the artists call them, look at ways that seemingly rational computer systems may provoke irrational behaviour in people, whether because they are overwhelmed by an onslaught of online data, or inspired by possibilities for play. What appear to be computer glitches are actually the chaotic actions of a user. “The computer is a device to get into someone’s mind,” JODI explained, adding, “We put our own personality there.”

Notice that they say 'Desktop performances' this became of primary importance to my own work after working on the Format C medialab project, Suda  which I will come to shortly.

This idea of desktop performance answered for me one of the main problems I'd hit in my own work , a tiredness with reusing found sources, given the nature of remix culture the same sources can crop up in the work of other artists, its not that I don't recognize that work as valid, it was more wanting to explore new avenues which are separate to the meaning that found work can carry and  the idea that the desktop itself as well as being a space that can be performative can also become a way of generating unique images and video which interrogate the space on its own terms. Rather than the desktop being a place to work in  it becomes a space to work with - a material in itself.  (Video of Jodi's My%Desktop working here https://www.youtube.com/watch?v=CPpUQQ7vMBk)

What Jodi's My desktop illuminates is that the desktop is at its heart a feedback system, if we press a button something usually happens , if we drag a window that window moves . Actions have consequences and meanings separate to those  we assign via skeuomorphic design. It becomes an arena or a performance space by our very act of our presence and our interactions, as you are now within the space of your own screen.

One of the fundamentals of glitch art is  feedback, are there ways to turn the desktop against itself to generate more feedback that we can use? The obvious answer would be to turn a webcam to face the screen , and this gives varying results and can also be seen in the context of early experiments with video feedback conducted by the pioneers of video art in the 60’s , 70’s and eighties . This approach can be fun especially when used alongside the processing environment  . 

Desktop as feedback system and performance space

A lot of what I do at the moment is based around online collaborations with Format C ( https://formatc.hr/about/ ) and  a sub-project of Format C - medialab which at the moment is focused on a project called Suda https://formatc.hr/medialab-2021-diwo/

For Suda we wanted something lightweight which would work online with little lag. Originally I experimented with TWM , which compared to win 95 or mac os is archaic , first appearing some time in 1989 or so ( it has similarities with CDE or the Unix common desktop  environment but crucially is open source whereas cde was/ is proprietary) and the first hint that something might be usable came by realising that minimised icons behaved very oddly and looked somewhat glitchy for example this;


or more simply;


In the end we chose to use ctwm because it's low resource and fairly easy to configure using a  single text file and more importantly unlike TWM it has click to focus, which we needed for one of the scripts that suda runs. Whilst working on TWM on Parabola Linux whilst trying to find a way of changing the background I discovered something interesting , issuing this command xsetroot -bg grey;

Allows us to drag and trail windows across the screen leaving behind trails and traces, turning icons and windows into brushes. It also reminds me of this from win 95/98;


Discovering this was only possible because as I later found Parabola Linux uses lxdm as the default display manager  in the live version I had installed. If you don't use Linux or haven't delved into it much, on Linux the display manager which communicates with the X11 server ( which controls how things are displayed on screen, screen size what sort of screen it is ie crt, lcd, laptop and input devices like mouse and keyboard) is separate to the desktop environment you use and is configured using a text file in this case /etc/lxdm/default.conf ( or lxdm.conf on some distros) and in default.conf there is this one line 
 
 arg=/usr/bin/X -background vt1
 
on every other distro I've looked at this line is commented out, ( ie with a #) but not on Parabola and once we uncomment that line on other distros we get the glitchify effect. This seperation between desktop , window manager and display server is what makes this area of enquiry possible.

So as I said earlier a lot of what I do at the moment is based around online collaborations specificaly around the Medialab project Suda. Ill just show Suda running in a short video below.


How does suda work? Suda is a set of scripts designed to run and be interacted within online in a kind of server as installation piece. Its desktop is dictated and adjusted by the text file ctwmrc  which is a human readable and editable file which can be altered as needed  allowing us to call up scripts which run certain programs. You can view the version of .ctwmrc that my version of Suda, Suda-Se  uses here https://crash-stop.blogspot.com/2023/01/suda-se-ctwmrc.html
 
At the heart odf the original online Suda  are four scripts, glitchify ( already discussed) , sudacam1, sudacam2 and manifesto ( which calls a second script suda-ctwm-xdotool.sh) Sudacam 1 and 2 use ffplay to open two windows , one at 640x480 resolution and one at 352x288 resolution which act as windows which show whatever the mouse acting as a lens via x11grab and -follow_mouse centered. The exact commandline is this ( with changes between the two for size)

ffplay -f x11grab -follow_mouse centered -framerate 10 -video_size 640x480 -i :0.0
 
These simple elements  allow me  to build up a visual complexity quite quickly, for example;


Feedback loops are essentially generative and what they create is often unexpected , depending on the elements I bring up or delete, open or close. It escapes the trap of looking for material to make glitch art from by becoming the process through which glitch can be created in real time from the desktop. And more than that it becomes an arena to play within outside the formal office space bounds of the gui based operating system or what we expect from narrative linear video and becomes almost a continuous collage of moving and static elements. Almost as if I was playing with hardware glitching techniques

I should at this point explain that the desktop environment I now use is one Ive only just started working with – the previous desktops that I talked about, ctwm and twm are simpler and use only one configuration file which allows me to add in menu entries to call up scripts. The desktop environment I use now, Icewm, is also quite configurable and by altering the text file ( ~/.icewm/toolbar ) I can add in scripts or programs I want which can be assigned buttons on the toolbar at the bottom so in effect I am configuring the workspace to trigger the shellscripts I need to generate feedback in real time. I have also come to appreciate the elements of the desktop as integral to what I’m doing – terminal output , icons , window bars error messages , the trails and movement of the mouse itself – I try not to hide these . So I can recreate what I was doing in ctwm but also add in new features like a script which snapshots an area on the screen then sets the background to that ( as well as saving those snapshots for later use, an example of this is below.


I also have scripts set up which change the colorspace of the windows opened and thus the quality of the feedback these are variations on the sudacam scripts which add in hex editing as well as playing with colourspace for example rather than 
 
lxterminal --geometry=17x18+0+3 -e 'ffplay -f x11grab -follow_mouse centered -framerate 10 -video_size 640x480 -i :0.0' 
 
we could alter it to this
 
ffmpeg -f x11grab -follow_mouse centered -framerate 3 -video_size 640x480 -i :0.0 -f rawvideo -vcodec rawvideo -pix_fmt monob -s 640x480 - | xxd -p | sed 's/802/18f/g' | xxd -p -r | ffplay -f rawvideo -vcodec tmv -pix_fmt monob -s 640x480 -

- example of these scripts running below.


And we can add in more elements using a slightly altered version again of the final script triggered above.


By adding a script to ~/.icewm/taskbar which calls a video I can also introduce a pre made video into the feedback process like so: ( though a better example might be this https://www.youtube.com/watch?v=matpsXvoP0c&t=5s


And finally we could add words. First I created a script which mashs several texts together line by line , these act as seed texts to the next stage which takes each seed text , runs those through dadadodo ( a text mangling program akin to William Burroughs cut up techniques ) and then two scripts run in parallel to write lines of text into a text editors window – we can then use that output as input for the other feedback windows i've already generated and add in a bit of displacement mapping as well by altering one of the scripts to this -
 
 ffmpeg -f x11grab -follow_mouse centered -framerate 10 -video_size 480x640 -i :0.0 -f x11grab -follow_mouse centered -framerate 10 -video_size 480x640 -i :0.0 -lavfi "[1]split[x][y],[0][x][y]displace" -f rawvideo -pix_fmt yuv420p - | ffplay -f rawvideo -pix_fmt yuv420p -s 480x640 -


In essence Ive created a feedback toolbox kit for the desktop which feeds on its imagery and generates broken and glitched visuals in a constantly evolving and recirculating way which can be used live as a performance tool or saved as video and edited down later looking for moments and threads which fit well together as in this longer form video here;


And this is the modified taskbar file in ~/.icewm/ that provides the functionality I'm using they are written in a format like this 

"sudacam1" application-x-shellscript.png /home/crash-stop/sudacam1.sh 

so its name as it appears in menu or mouseover of toolbar icon, icon to use ie application-x-shellscript.png ( for shellscript) icons must be accesible to icewm ie in ~/.icewm/icons/ ( i cheated and moved some system wide ones i wanted to use into that folder to make them accessible) and finally where the program or shellscript is ( programs generally are in /usr/bin/ whilst shellscriptsI keep in my home folder) so below is my ~/.icewm/toolbar as used above 

# This is a default toolbar definition file for IceWM
#
# Place your personal variant in $HOME/.icewm directory.

#prog XTerm ! x-terminal-emulator
#prog FTE fte fte
#prog Netscape netscape netscape
prog     "Processing" pde-32.png /home/crash-stop/processing-3.5.4/processing
prog    "Glitchify" application-x-executable.png /home/crash-stop/glitchify.sh
prog    "Scrot" image-x-generic.png /usr/bin/scrot
prog     "Recordmydesktop" camera-video.png /home/crash-stop/startcam.sh
prog    "Vim" vim /usr/bin/mousepad
prog     "Terminal" terminal.png xterm
prog     "File Manager" file-manager.png pcmanfm
prog    "WWW" ! x-www-browser
prog     "sudacam1" application-x-shellscript.png /home/crash-stop/sudacam1.sh
prog     "sudacam2" application-x-shellscript.png /home/crash-stop/sudacam2.sh
prog     "Norandom" application-x-shellscript.png /home/crash-stop/norandom.sh
prog     "mantissacam1" application-x-shellscript.png /home/crash-stop/mantissacam.sh
prog     "mantissacam2" application-x-shellscript.png /home/crash-stop/mantissacam2.sh
prog     "Norandom2" application-x-shellscript.png /home/crash-stop/norandom2.sh
prog     "Background" application-x-shellscript.png /home/crash-stop/background.sh
prog     "TVM" application-x-shellscript.png /home/crash-stop/tvm.sh
prog     "Displace" application-x-shellscript.png /home/crash-stop/desktopdisplacett.sh
prog     "MVT" application-x-shellscript.png /home/crash-stop/tvm2.sh
prog     "B&W1" application-x-shellscript.png /home/crash-stop/sudacam3.sh
prog     "B&W2" application-x-shellscript.png /home/crash-stop/sudacam4.sh
prog     "V4l2" application-x-shellscript.png /home/crash-stop/v4l2test.sh
prog     "UnholyWriter" accessories-text-editor-symbolic.symbolic.png /home/crash-stop/start.sh
prog    "Movie1" inode-core.png /home/crash-stop/movie.sh
prog    "Movie2" inode-core.png /home/crash-stop/movie2.sh
prog     "Displace2" application-x-shellscript.png /home/crash-stop/desktopdisplace2.sh


Monday, 2 January 2023

Suda-SE .ctwmrc

 This is the basic configuration file for the ctwm desktop environment used in the modified version of Suda that I run on my own computers. The text is self explanatory , its based on Thomas Eriksson and Steve Litts original .ctwmrc file found via the xwinman website. This is obviously specific to my setup and you will have to change things that relate to your own home folder, shellscripts you want to run and programs you want to appear in your own menu's.

#Modified .ctwmrc based on the work of those mentioned below - Thomas Eriksson and STEVE LITT
#
# $XConsortium: system.twmrc,v 1.8 91/04/23 21:10:58 gildea Exp $
#
# A little $HOME/.twmrc by Thomas Eriksson brummelufs@hotmail.com
#
# Modified (just colors and some menu options) by Istvan Keppler keppler@lajli.gau.hu
#
#   twm... the original and the best...
#

#---------------------------------------------------------
# EMERGENCY
# This line is here so that U will be able 2 restart CTWM
# even if the rest of the file doesn't work very well!
# To restart in emergency press shift and F9 !
#---------------------------------------------------------

"F9" = s : r|w|t|m|f : f.twmrc  #shift "L2": source .ctwmrc
#---------------------------------------------------------

NoGrabServer
#NoDefaults
RestartPreviousState
DecorateTransients
TitleFont "-*-unifont-medium-*-normal-*-*-*-*-*-*-*-*-15"
ResizeFont "-*-unifont-medium-*-normal-*-*-*-*-*-*-*-*-15"
MenuFont "-*-unifont-medium-*-normal-*-*-*-*-*-*-*-*-15"
IconFont "-*-unifont-medium-*-normal-*-*-*-*-*-*-*-*-15"
IconManagerFont "-*-unifont-medium-*-normal-*-*-*-*-*-*-*-*-15"
#ClientBorderWidth 2
BorderWidth 3
ButtonIndent 2
NoHighlight
AutoRelativeResize
#DefaultBackground
FramePadding 0
#ForceIcons
NoRaiseOnMove
OpaqueMove
Zoom 500

######## BEGIN STEVE LITT'S MODERNIZATTION SETTINGS #########
ClickToFocus            # Prevent mouse movement changing focus
RaiseOnClick            # Window rises when clicked
RaiseOnClickButton 1    # When clicked with button 1, that is.
UsePPosition "on"       # Help kbd instantiated windows get focus
RandomPlacement "on"    # Help kbd instantiated windows get focus
AutoFocusToTransients   # Help kbd instantiated windows get focus
SaveWorkspaceFocus      # Obviously workspace focus should be retained
#WindowRing              # Enable Alt+Tab type window circulation
#WarpRingOnScreen        # Enable Alt+Tab type window circulation
IgnoreCaseInMenuSelection # Make menus much easier via keyboard
ShortAllWindowsMenus    # Don't show iconmgr and workspace mgr in lists

########  END  STEVE LITT'S MODERNIZATION SETTINGS #########   

#---------------------------------------------------------

#---------------------------------------------------------
# PIXMAP CONFIG and
# PIXMAPS
#---------------------------------------------------------

PixmapDirectory          "/usr/share/ctwm/images"    # dir. for xpms

Pixmaps
{
    #TitleHighLight "xpm:blue4.xpm"
}

# ---------------
# Managers
# ---------------
# this section for bars on right side showing open or minimised windows like taskbar in win or |#lxde  
ShowIconManager
SortIconManager
IconManagerGeometry    "64x128-0+0" 1

#This section shows the worspaces available in bottom right hand corner default here is four
# Uncomment to have this function
#DontPaintRootWindow
#ShowWorkSpaceManager
#StartInMapState
#workspacemanagergeometry        "260x66-0-0" 4
#MapWindowCurrentWorkSpace {"Red"  "SkyBlue"  "Blue"  #"xpm:ASBBlockGreen.xpm"}
#WorkSpaces {
    #"One"     {"grey" "black" "Blue3" "blue" "xpm:ASBBlockBlue.xpm" }
    #"Two"     {"grey" "green" "black" "blue" "xpm:ASBBlockBlue.xpm" }
    #"Three"   {"grey" "green" "black" "blue" "xpm:ASBBlockBlue.xpm" }
    #"Four" {"grey" "white" "black" "blue" "xpm:ASBBlockBlue.xpm" }
}


# This is for hiding the ugly menubar in windows who dont need em.
NoTitle
{
     # "xosview"
}

Color
{
    BorderColor "gray85"
    DefaultBackground "black"
    DefaultForeground "gray85"
    TitleBackground "black"
    TitleForeground "gray85"
    MenuBackground "black"
    MenuForeground "gray85"
    MenuTitleBackground "gray65"
    MenuTitleForeground "black"
    IconBackground "black"
    IconForeground "white"
    IconBorderColor "black"
    IconManagerBackground "black"
    IconManagerForeground "gray85"
    PointerForeground "black"
    PointerBackground "white"

}

#
# Define some useful functions for motion-based actions.
#
MoveDelta 1
Function "move-or-lower" { f.move f.deltastop f.lower }
Function "move-or-raise" { f.move f.deltastop f.raise }
Function "move-or-iconify" { f.move f.deltastop f.iconify }

#
# Set some useful bindings.  Sort of uwm-ish, sort of
# simple-button-ish
#
Button1 = : root : f.menu "prg"
Button2 = : root : f.delete
Button3 = : root : f.menu "window"

Button1 = m : window|icon : f.function "move-or-lower"
Button2 = m : window|icon : f.iconify
Button3 = m : window|icon : f.function "move-or-raise"

Button1 = : title : f.function "move-or-raise"
Button2 = : title : f.raiselower
Button3 = : title : f.iconify

Button1 = : icon : f.function "move-or-iconify"
#Button2 = : icon : f.destroy
Button3 = : icon : f.iconify

Button1 = : iconmgr : f.iconify
Button2 = : iconmgr : f.destroy
Button3 = : iconmgr : f.iconify

#........................................................................#
# This is for the buttons in the window bar


LeftTitleButton     ":xlogo" = f.delete

#........................................................................#

#
# And a menus with the usual things
# Add Item here then follow structure after this section if you want to add other sections
menu "prg"
{
"Suda-SE"           f.title
#""        f.nop
"Xterm"         f.exec "xterm -sl 255 -bg black -fg white -name xterm@twm.org &"
"Lxterminal"    f.exec "lxterminal &"
"Xosview"        f.exec "xosview &"
"Abrowser"      f.exec "abrowser &"
""              f.nop
"Files"        f.menu "files"
"Editors"    f.menu "editors"
"Internet"      f.menu "internet"
"Graphics"      f.menu "graphics"
"Viewers"    f.menu "viewers"
"Multimedia"    f.menu "Multimedia"
"Suda"        f.menu "Suda"
"Suda-SE"        f.menu "Suda-SE"
"Utilities"     f.menu "utilities"
"System"    f.menu "system"
#"Spare"   f.menu "spare"
}

menu "files"
{
"Files"        f.title
"PCmanFM"            f.exec "pcmanfm &"
"MC"                f.exec "xterm -e mc &"
}


menu "editors"
{
"Editors"    f.title
"Geany"        f.exec "geany &"
"Vim"        f.exec "xterm -e vim &"
"Mousepad"    f.exec "mousepad &"
}

menu "system"
{
"System"     f.title
"Top"        f.exec "xterm -bg black -fg white -e top &"
}

menu "viewers"
{
"Viewers"    f.title
"Gpicview"    f.exec "gpicview &"
}
menu "internet"
{
"Internet"    f.title
"Abrowser"      f.exec "abrowser &"
"Links2"       f.exec "xterm -bg black -fg white -e links2 &"
#""           f.nop
}


menu "graphics"
{
"Graphics"      f.title
"Screenshot"          f.exec "scrot &"
"Mtpaint"       f.exec "mtpaint &"
}

menu "Multimedia"
{
"Multimedia"            f.title
"Smplayer"    f.exec "/usr/bin/smplayer &"
"Screenrecorder"    f.exec "simplescreenrecorder &"
"Recordmydesktop" f.exec "xterm -e ./recordmydesktop.sh &"
"Mixer"    f.exec "alsamixergui &"
"Webcam"    f.exec "ffplay -i /dev/video0 &"
"Hexcam"    f.exec "./webcamhex.sh &"
 }

menu "Suda"
{
"Glitchify"    f.exec "xsetroot -bg grey"
"Sudacam1"        f.exec "./sudacam1.sh &"
"Sudacam2"        f.exec "./sudacam2.sh &"
"Manifesto"    f.exec "./manifesto.sh"
"NoRandom"    f.exec "xterm -e ./ctwmnorandom.sh &"
}

menu "Suda-SE"
{
"TVM"    f.exec "./tvm.sh & "
"v4l2"    f.exec "./v4l2test.sh &"
"Mantissa" f.exec "./trigger.sh &"
"Displace" f.exec "./desktopdisplace.sh &"
"Background"    f.exec "./background.sh &"
"Processing"    f.exec "/home/crash-stop/processing-3.5.4/processing &"
}

menu "utilities"
{
"Utilities"      f.title
"Xfontsel"        f.exec "xfontsel -rv &"
"Xclock"     f.exec "xclock -digital &"
"Xcalc"        f.exec "xcalc -rv &"
"Xkeycaps"    f.exec "xkeycaps &"
"Lxrandr" f.exec "lxrandr &"

}

menu "window"
{
"X Windows"      f.title
"Kill Window"    f.destroy
"Delete Window"  f.delete
""               f.nop
"Maximize"       f.fullzoom
"Minimize"       f.iconify
#"Resize"         f.resize
"Move"           f.move
#"Raise"          f.raise
#"Lower"          f.lower
""               f.nop
"Focus"          f.focus
"Unfocus"        f.unfocus
"Show Iconmgr"   f.showiconmgr
"Hide Iconmgr"   f.hideiconmgr
""               f.nop
#"Screensaver"    f.menu "xscreensaver"
"Redraw"         f.refresh
"Restart"        f.restart
"Quit"           f.menu "quit"
}

menu "quit"
{
"Really Quit?"     f.title
"No"               f.nop
"Yes"              f.quit
}

#menu "spare"
{

}

Icons
{
     #"XTerm"   "/usr/share/ctwm/images/term.xpm"
    
}

Cursors
{
                         Frame     "left_ptr"
                         Title     "left_ptr"
                         Icon      "left_ptr"
                         IconMgr   "left_ptr"
                         Move      "fleur"
                         Resize    "fleur"
                         Menu      "hand1"
                         Button    "hand2"
                         Wait      "clock"
                         Select    "dot"
                         Destroy   "pirate"
}


Thursday, 6 October 2022

Gifatron - automated hexed gifs from one image.


This script is a modification of the previous post . It doesnt just glitch a single image randomly using openssl it also outputs those images as a gif . Its tuned more for Tumblr which has a 10mb limit on gifs , it also downsizes the input picture if need be to 640x480 .

On both windows and linux you will need imagemagick installed, on Windows 10 I'd advise installing the version available from the imagemagick website over installing via chocolatey ( from here https://imagemagick.org/script/download.php )plus you will also need git-bash terminal installed,  this will not work in windows powershell!! When asked for no of iterations 5 is probably best to keep down the size. Save the script below as a file with .sh extension and dont forget to make it executable - on linux chmod u+x uncomment the linux bits and comment out the windows bits . This also does some trickery with headers ( I'm converting the input file to pam and then storing the header, stripping it, then adding it back after glitching - it helps stop the file becoming unreadable - doesnt work everytime note so you will see error messages at some point.

Also remember to delete the jpgs created by the process afterwards or they get mixed back into the next gif you make , which you might want but it does make the file bigger !! ( see previous post for description of how to alter random hex generation)

#! /bin/bash
echo -n "name of image ? : "
read f

echo -n "How many iterations (whole number) : "
read n
i=0
#windows
magick convert -resize 640x480\! $f test.pam

#linux
#resize info here https://imagemagick.org/Usage/resize/#resize
#convert -resize 640x480\! $f test.pam

while [ $i -lt $n ]
do
    ((i++))

 #get header
  sed '2,$d' test.pam > head.pam;

#strip header ( to avoid damaging it)
  sed -b '1d'  test.pam > swap.pam
 from=$(openssl rand -hex 1)
  to=$(openssl rand -hex 2)
 
xxd -p swap.pam | sed 's/'$from'/'$to'/g' | xxd -p -r > help.pam

#put the header back
cat head.pam help.pam> headswap.pam;

#windows
magick convert headswap.pam  $i.jpg

#linux
#convert headswap.pam image-00$i.jpg
rm help.pam

done
#morphgif
#windows
magick convert -delay 5 *.jpg -morph 14  gifatron-$from-$to.gif
#linux
#convert -delay 5 *.jpg -morph 14  gifatron-$from-$to.gif


Tuesday, 4 October 2022

Randomly hex images using open ssl


In response to a question in an online diwo ( do it with others) session during this years Fubar https://fubar.space/ I came up with a script that uses openssl to generate random hex numbers which can then be used to glitch the same image over and over but with random values. 

The script is below , its a bit rough and ready and requires that you have imagemagick installed ( on windows via chocolatey) and openssl and run it through git-bash. Note the commented out sections - for linux  it works as is for windows comment out the linux section and uncomment the windows section) - I made a gif from the 23  images generated as proof of concept. 

Try adjusting the values after where hex is written ie  

from=$(openssl rand -hex 1)
  to=$(openssl rand -hex 2)

in each case try different values after the -hex upt to 256 ( equal values in each statement will yield little or no change)

 Script is below ( dont forget to chmod u+x it !!)

#! /bin/bash
echo -n "name of image ? : "
read f

echo -n "How many iterations (whole number) : "
read n


i=0
#windows
#magick convert $f test.ppm

#linux
convert $f test.ppm

while [ $i -lt $n ]
do
    ((i++))

 
 from=$(openssl rand -hex 1)
  to=$(openssl rand -hex 2)
 
 
xxd -p test.ppm | sed 's/'$from'/'$to'/g' | xxd -p -r > help.ppm
#windows
#magick convert help.ppm  $i.jpg

#linux
convert help.ppm image-00$i.jpg
rm help.ppm


done


Tuesday, 19 July 2022

FFmpeg, virtual webcams and processing

Following on from the previous post on revisiting convolution in processing and trying to tie that in with my previous explorations of the desktop as a performance space and feedback generator wouldnt it be good if there was a way to pass the desktop as video into processing scripts in a similar way to that in which ffmpegs' x11grab allows us to open a window which follows the mouse focus around the desktop like a virtual webcam ? 

Turns out there is. A friend had told me about V4l2loopback previously, a way of creating virtual webcams in Linux and then thinking about it the other day I came across this post which describes how to do it https://narok.io/creating-a-virtual-webcam-on-linux/ but that author streams a video file rather than what I want which is the same input as I get from x11grab. Why ? If we can create a virtual webcam we can use that as an input for processing so we can extend the possibilites of desktop feedback loops .

TLDR: do this on Debian based systems 

*edit 2026 make sure before running these commands that you have the kernel headers for your particular kernel installed before running these commands, otherwise it will fail to work. 

install this

sudo apt install v4l2loopback-dkms

run this command  

sudo modprobe v4l2loopback devices=1 video_nr=10 max_buffers=2 exclusive_caps=1 card_label="Default WebCam"

then this 

ffmpeg -f x11grab -follow_mouse centered -framerate 10 -video_size 640x480 -i :0.0 -f v4l2 -vcodec rawvideo -s 640x480 /dev/video10

To check that it is working open obs-studio and select "Default WebCam (v4l2loopback-Default_WebCam-video)" as the video input device - if this option isn't there recheck the previous steps.

Then open a script in processing which uses a webcam for input ( ie the convolution scripts ive been working on ) and experiment. 


Tuesday, 5 July 2022

Revisiting Convolution in Processing


Recently I've been revisiting a convolution script I use in the Processing environment based on this script by Daniel Shiffman here https://processing.org/examples/convolution.html

My version of that is modified to take an input from a webcam or video capture device and perform convolution on the input in real time - outputting video in the processing sketch window. This is done by taking a snapshot of the video feed then performing the convolution on that image and outputting that into the view port, it happens so quickly ( for the most part) that it seems as you are seeing continuous video . 

I've also modified the script by combining it with another example script that comes with processing that pixelates video - it seems to improve the quality of convolution. The output of this version also reminds me of the effects I can achieve using some of my circuit bent cameras.

The kernels ( convolution matrices) I'm using are based in part on the work of Kunal Agnohotri who gave a talk to Fubar 2019 on 'Hacking convolution filters'

Below is the script in its working state that Ive been running on Gnuinos Linux ( a fully libre version of Devuan Linux that Ive started to swap over too). Its messy with my additions and thoughts and working notes . Ive recently discovered that you can use the script without video source attached and it will quite happily generate video if you comment out the part that states  ' image(video, 0, 0);' by using // .This is what piqued my interest in revisiting this way of working as I'm more and more drawn to black and white and its possibilitys (video of that below before the script ) 


** The script is below this - tested and running on Processing 3.5.4 with video libraries installed you should be able to copy and paste this into a fresh blank sketch in processing  **


import processing.video.*;

PImage img;
PImage edgeImg;

String imgFileName = "face";
String fileType = "jpg";

// from pixelated_video

int signal = 0;
int numPixelsWide, numPixelsHigh;
int blockSize = 2;

color CaptureColors[];

// change values in matrices below for different effects
 //below is reference matrix for bw convolution with no input image ie self generating
//float[][] matrix = { { -0.75, -0.6, -0.4, },
                     //{0.1, -1, 1.9,  },           
                     //{ 0.1, 0.8, 0.7, }  };
                    
 float[][] matrix = { { 0, -192, -1,  },
                     { 1, 2, 0,},
                      {0, -10, 700,  }
                    
                       };
Capture video;                  
                 
void captureEvent(Capture video) {
  video.read();
}
void setup() {
  size(720, 480);
  noStroke();
  video = new Capture(this, width, height);
  video.start(); 
 // saveFrame("face.jpg");
 
}

void draw() {
 
    {


    //comment out first statement below (starting with image) to get bandw no image convolution only      
   image(video, 0, 0);
      //filter(POSTERIZE,4);
       //filter(INVERT);
       //filter(DILATE);

    saveFrame("face.jpg");
   
   edgeImg = loadImage("face.jpg");
  
    edgeImg.loadPixels();


  // Calculate the convolution
  // change loopend for number of iterations you want to run
  int loopstart =0;
  int loopend =4;
  int xstart = 0;
  int ystart =0 ;
  int xend = 720;
  int yend = 480;
  //  'int matrixsize = ' is number of rows down in matrix.
  int matrixsize = 3;
   
  // Begin our loop for every pixel in the image
 
  for (int l = loopstart; l < loopend; l++) {
  for (int x = xstart; x < xend; x++) {
    for (int y = ystart; y < yend; y++ ) {
      color c = convolution(x, y, matrix, matrixsize, edgeImg);
      int loc = x + y*edgeImg.width;
     edgeImg.pixels[loc] = c;
    
     
    }
       }
      
        }
  // image(edgeImg, 0, 0, edgeImg.width, edgeImg.height);
  
   int count = 0;
  
   numPixelsWide = edgeImg.width / blockSize;
  numPixelsHigh = edgeImg.height / blockSize;
 // println(numPixelsWide);
  CaptureColors = new color[numPixelsWide * numPixelsHigh];
 
   // loop for pixelation set block size
   for (int p = 0; p < numPixelsHigh; p++) {
      for (int q = 0; q < numPixelsWide; q++) {
        CaptureColors[count] = edgeImg.get(q*blockSize, p*blockSize);
        count++;
      }
    }
    for (int p = 0; p < numPixelsHigh; p++) {
    for (int q = 0; q < numPixelsWide; q++) {
    fill(CaptureColors[p*numPixelsWide + q]);
      rect(q*blockSize, p*blockSize, blockSize, blockSize);
     
    }
    }
  //saveFrame("face.jpg");
    //saveFrame("image####.jpg");
   }
    }
color convolution(int x, int y, float[][] matrix, int matrixsize, PImage edgeImg)
{
  float rtotal = 0.0;
  float gtotal = 0.0;
  float btotal = 0.0;
  // change 'int offset = matrixsize' is rows across matrix
  int offset = matrixsize / 3;
  for (int i = 0; i < matrixsize; i++){
    for (int j= 0; j < matrixsize; j++){
      // What pixel are we testing
      int xloc = x+i-offset;
      int yloc = y+j-offset;
      int loc = xloc + edgeImg.width*yloc;
      // Make sure we haven't walked off our image, we could do better here
      loc = constrain(loc,0,edgeImg.pixels.length-1);
      // Calculate the convolution
      rtotal += (red(edgeImg.pixels[loc]) * matrix[i][j]);
      gtotal += (green(edgeImg.pixels[loc]) * matrix[i][j]);
      btotal += (blue(edgeImg.pixels[loc]) * matrix[i][j]);
    }
  }
  // Make sure RGB is within range
  rtotal = constrain(rtotal, 0, 255);
  gtotal = constrain(gtotal, 0, 255);
  btotal = constrain(btotal, 0, 255);
  // Return the resulting color
  return color(rtotal, gtotal, btotal);
}
 

Thursday, 9 June 2022

Amber - towards an archival operating system.

What is Amber and who is it for?

I use Linux almost exclusively, either Devuan or Parabola. Devuan because it doesn't use systemd which I'm inherently suspicious of as it goes against basic unix philosophy of  "do one thing and do it well", more on that here and here  . I've found on the whole Devuan and non systemd based distros  faster and more stable than say Linuxmint or anything Ubuntu based on the second hand or trash picked machines I generally use . Parabola is stupidly fast ( and comes in systemd and non systemd versions), but takes longer to install and is a rolling release model as opposed to Devuan's stable release LTS ( long term support) model. The advantage of using Devuan ( or Debian or Ubuntu) is that releases are supported for longer and those projects maintain usable archives of older releases meaning that old versions though no longer supported can still be installed and used and packages installed from those online archives.

Devuan addresses for me the disadvantage of working digitally from an artists point of view that software and hardware changes over time. As software and hardware changes so does my ability to continue working in ways that I've found productive. Web cams in particular and certain capture cards that I have based a lot of my work on (and still do ) have mostly had kernel support dropped in the recent past . Examples of that would be ffmpeg dropping support for codecs like libschroedinger. Yes I can download and recompile that from the original source code ( if those sources are still available) but then I'm left with two installations that I have to swap between. Another example is  gtk-recordmydesktop the gui frontend for recordmydesktop, a piece of software I've used a lot for screen-capturing playback of hex edited/datamoshed video that won't bake ( re-encode)  in the same way using handbrake or even ffmpeg itself , that disappeared from most distros repos a while back (though the cli verson is still available the gui version made life much easier). You could ask , well why don't you use obs-studio , and yes on my newer machines I do, but older machines though capable pf running newer versions of devuan ( and Parabola - its hilarious to see that parabola will boot on an old dell dimension 3000 with a single core ht processor from 2003 ) will not run obs-studio as the processors dont have the correct instruction set extensions - so something like gtk-recordmydesktop is pretty indespensible As my work is glitch based a lot of the time the effects that I get are dependent on quirks in software or hardware , if those quirks are removed then that software becomes unusable. Also gtk-recordmydesktop records in ogv format which when played in gnome-mplayer on older versions of linux like Ubuntu 10.04 and Ubuntu 6.04 give some really interesting playback flaws.

I had to find a way of recreating/preserving the environment I had been using up until quite recently so that I'd be able to be able to use  those techniques and ways of working in a form which could run from either DVD or USB stick, and also be installable to be able to keep on reusing older hardware.


Amber is a project I've been working on for the last six months or so. and is based on Devuan's first release Jessie which in turn was Devuans first release after the split with Debian over systemd . I've found it works very well on older hardware, and has support for my various circuitbent webcams and capture cards ( which newer versions of linux and windows do not) - its not to modern and its not to old. I do have various machines running Windows Xp , Ubuntu 6.04/10.04 and various community versions of Puppy linux ( legacy os 2017 and Legacy os 4 mini ) all of those I keep around in installed and live versions because of the various software and hardware flaws I've discovered over time that I use in my work. 

Find Devuan here https://www.devuan.org/

Find Devuan Jessie here  https://www.devuan.org/os/announce/stable-jessie-announce-052517

Find Amber here  https://archive.org/details/snapshot-20220607_2202

Installing from scratch

(This isn't a beginners guide I'm presuming you have a basic understanding of Debian based systems, partioning, installing and how to configure and troubleshoot them). 

If you have found and downloaded the original ISO for Devuan Jessie and burnt it to DVD ( Important note here from experience use DVD not USB for installation  as post-installation Devuan will look for the packages on DVD not USB until you have it set up even if you used USB to successfully install) I have also discovered that during installation it will ask if you want to use a network mirror, say no obviously as the original mirrors /etc/apt/sources.list points to no longer exist as Devuan Jessie is now archived - the archives are there but old install media won't see them. That will make the install possible - if you specify to use a network mirror the installation will possibly fail. But that also means after installation you may not have networking as it won't install network manager etc. You will have to do that manually and thus you need the DVD because that has the packages you need post-install).

It makes life easier after installation if you have both a root account and a user account ( there are quirks in Devuan Jessie which need root approval even though you can install without root and using sudo). After install you will have to  keep that DVD in the drive to install stuff to get online and  its the only media your apt sources list will see , install network-manager and the gnome equivalent notifier ( they are on the disk) using apt get install  then change your apt sources list to this ....

# deb cdrom:[Debian GNU/Linux 1.0-final _Jessie_ - Official amd64 DVD Binary-1 20170522-03:57]/ jessie main non-free

#deb cdrom:[Debian GNU/Linux 1.0-final _Jessie_ - Official amd64 DVD Binary-1 20170522-03:57]/ jessie main non-free

# jessie-security, previously known as 'volatile'
# A network mirror was not selected during install.  The following entries
# are provided as examples, but you should amend them as appropriate
# for your mirror of choice.
#
 deb http://archive.devuan.org/merged jessie          main contrib non-free

then do sudo apt update but you will also have to download a more modern devuan keyring
( from here  https://www.devuan.org/os/keyring ) and either do

 dpkg -i devuan-keyring_2017.10.03_all.deb (as root).

or install gdebi and do it that way - after that you do 'sudo apt update' again and you shouldn't get warnings about unverified sources ( which is why you need the new keyring)

***************************************************************************************

The iso I have made can be run as a live DVD or installed to a hard-drive using the included refracta installer ( hint open a terminal while running from the live DVD and type in 'sudo refractainstaller' and follow the on-screen instructions carefully) with added applications for making glitch art video, sound and stills ( and gifs via ffmpeg or gimp). Its a snapshot of a working system that I created as a personal archive of tools, ideas  and scripts (see script section and the processing sketchbook in the home folder) before the tools and repositories that I'd been using for a few years changed or disappeared into the mists of time. It is both documentation and archaeology as it took a while to put together (given that software toolsets change quite a lot, to get the video function in processing working for using webcams meant finding an earlier version of the processing video library as the current version as of spring 2022 won't work with the gstreamer version that Devuan Jessie comes with so in processing when it asks if you want to update to a newer version of that library don't).

The machines I used up until quite recently were low end core2duos (ie the pentium version with lower cache size and slightly more sluggish), socket AM2 single core or duel core Athlon's (or even final run socket 775 HT pentiums) and the software and hardware I used reflected this. I felt I needed to put this together so I would have a record of how I worked and the possibility of continuing/recreating that if circumstances required it without having to root around looking for the various software versions installed here.

It also serves as a proof of concept for working in a sustainable way with older or recycled hardware, there is a glut of low end computers being sent to landfill, and if through personal circumstances  someone ( or me ) can't afford an even modest 2nd or third gen i3 or newer it means the barrier to entering into making glitch art or digital art can be made lower. This operating system as set up is usable on a modest Thinkpad T61 with a 2ghz core2duo and 4gb of ram from 2008 ( I have run this version of Devuan on a pentium 630 ht with 2gb of ram and spinning hardrive)

You don't have to use the version of ffmpeg I've installed  (4.4.1) I've downloaded a few versions ie 2.8 / 3.4.9 and 4.4.1, 2.8  is one that allows using of obscure codecs like  libschroedinger ( that disappeared from newer versions of ffmpeg in favor of dirac which does not behave the same way at all when hex edited) but doesn't have ffplay functionality. I've compiled 2.8 and 3.4.9 and run make on both but not sudo make install - if you need to use that first navigate to the ffmpeg 4.4.1 folder in Downloads run sudo make uninstall then find the ffmpeg  2.8 folder and run sudo make install. Or if you don't want to go that far find the 2.8 folder in downloads  place the video you want to work in there and use it in that folder i.e. as a stand-alone. I've compiled ffmpeg 4.4.1 with support for cavs ( reading  and encoding).

Fun fact to install FFmpeg with ffplay support you need to have libasound2-dev
and SDL2 compiled and installed, more info here:
https://www.programmerall.com/article/8543614812/

This Distro remix also has build-essential and most build tools like cmake, nasm, yasm gcc etc included, and also ruby for using aviglitch. I have bookmarked links to websites in Firefox which might give some insight into how this distro was put together . So if you wanted to recompile ffmpeg or install software from source you should be able to do that within the limitations of the distro itself .

Why Devuan ? I started experimenting with Devuan around the time this version came out ( 2017?) and discovered it worked really well on lower end machines, its fairly conservative in its approach and rock solid, and not using systemd  seems to give an extra oomph with older machines, and to be honest I like Devuans philosophy. There is also the wonderful refracta toolset to consider, Refracta being a spin of Devuan , the refracta toolset makes it stupidly easy to make snapshot isos of a running system which is also installable, so I can make new snapshots of the system as I refine it and use it as a basis for archiving and reproducing my working methods and tools over time without having to desperately search for archives of programs or tools on the way back machine . 


I've never been a fan of rolling distros as they often break a method that I've found of working with an update and I was getting pissed off with the way that my previous distro of choice, linuxmint started to go, vlc in Mint became unusable and newer versions of linuxmint and Debian just didn't seem as snappy. Another important reason for using this version of Devuan is that it excels at recognising and making usable older webcams, a lot of my work is based around circuit bending old webcams and for some reason this version of Devuan has recognised and allowed me to use more than any other Distro I've used and as a bonus it supports older TV capture cards ( PCI and USB ) which are handy for capturing from other computers via vga to composite adaptors, or just capturing old VHS c input or even old VHS or satellite boxes - just because something is old doesn't mean it isn't useful,  often the textures I find using these old things are more interesting than those I get from newer HDMI capture methods.

Who is it for?

Primarily its for me as an artist working with open-source tools and recycled /obsolete hardware to make glitch art. These are the tools I've used since 2012 or so in various forms and on various distros. This remix draws all of them together so that I have a snapshot and usable environment to document and save those tools in case I need them again, so its part documentation, part archaeology and part useful toolset, the way I've put it together means it can be installed and used offline if need be without an internet connection as most tools neded are here. If somebody else finds it useful or helpful that's also good.

Notes on the software.

As I said I've compiled ffmpeg  from source but with the cavs encoder as well ( cavs is pretty awesome and another of those things getting harder to track down as it seems to be discontinued development wise ) so you can checkout the xavs source code via subversion on the commandline - doing this 'svn checkout https://svn.code.sf.net/p/xavs/code/trunk xavs-code' compile that then compile ffmpeg with support for xavs more info here

 
I also I had to compile avidemux from source as Devuan doesn't have it in the available repositories and I wanted the lower version as newer versions are not useful for datamoshing ( version installed here is version 2.5.6 download source code here http://avidemux.sourceforge.net/download.html and follow instructions for compiling here , though they are for 2.6 version , Make the bootstrap.sh script executable then do sudo './bootstrap.sh' it can take a while to compile . after its finished it leaves and executable in /usr/bin which you can call from the command line by doing ' /usr/bin/avidemux_qt4' but thats clumsy - if you edit a desktop file as per https://www.internalpointers.com/post/add-new-menu-items-xfce-menu that makes it turn up in the multimedia menu in xfce, which is what I did here by writing and editing a .desktop file and placing it in /usr/share/applications ( as root) referencing the icon from the downloaded and unzipped package in home.

Everything else is pretty standard, gimp with gmic plugins , audacity and sox ( sox is useful for sonification) and standard office stuff like libreoffice ( with english dictionary ) calibre, and suchlike for editing documents or putting together epubs . I included Netsurf and Links2 also as I find them aesthetically pleasing.

you might find hard to find multimedia binaries and codecs not installed here
https://archive.deb-multimedia.org/

I did want to include ctwm in this but opted for TWM as ctwm keeps crashing on Devuan Jessie and I havent yet been able to work out why ( plus Jessie has no binaries for lxdm that I have been able to track down and ctwm works in the way that I want it to with lxdm not Slim ). There will be a 32 bit version soon and a second version of Amber that I'm working on which does include ctwm and lxde based on Devuan Ascii - but they are not ready yet when they are I will post links here.

Crash-stop spring 2022

So ya gotta shiny new mac and want to run linux scripts?

 So, you've sold your soul to the devil and bought a shiny new or second hand ( in my case ) mac book pro ( with the shiny new apple sil...